Overview
Pixcode gives developers one browser-based workspace for AI coding CLIs. The app runs locally or on a server, serves a React/Vite frontend, and exposes an Express/WebSocket backend that controls provider processes, project files, Git state, shell sessions, notifications, and orchestration workflows.
The core idea is simple: keep the provider-native command line tools, but add a serious control surface around them. A coding agent can edit files, run commands, wait for permissions, fail, recover, or hand work to another model. Pixcode is designed to make those states visible and manageable instead of hiding them behind a blank terminal.
Developers, solo builders, teams, educators, and automation-heavy users who want to run AI coding agents on their own machine or server.
Pixcode is not a hosted cloud IDE and not an official OpenAI, Anthropic, Google, Cursor, Qwen, or OpenCode product.
Provider support
Pixcode currently targets Claude Code, Cursor CLI, OpenAI Codex, Gemini CLI, Qwen Code, and OpenCode. Each provider can have its own authentication flow, model list, session handling, MCP behavior, CLI installation status, and runtime output style.
- Claude Code support with sessions, hooks, notifications, and MCP-related provider settings.
- Codex support for OpenAI-backed coding workflows and REST-triggered automation.
- Cursor CLI support for developers who already keep Cursor CLI in their local workflow.
- Gemini CLI support for Google model workflows.
- Qwen Code support for Qwen-based coding flows.
- OpenCode support with model selection and free/open provider use cases.
Workspace UI
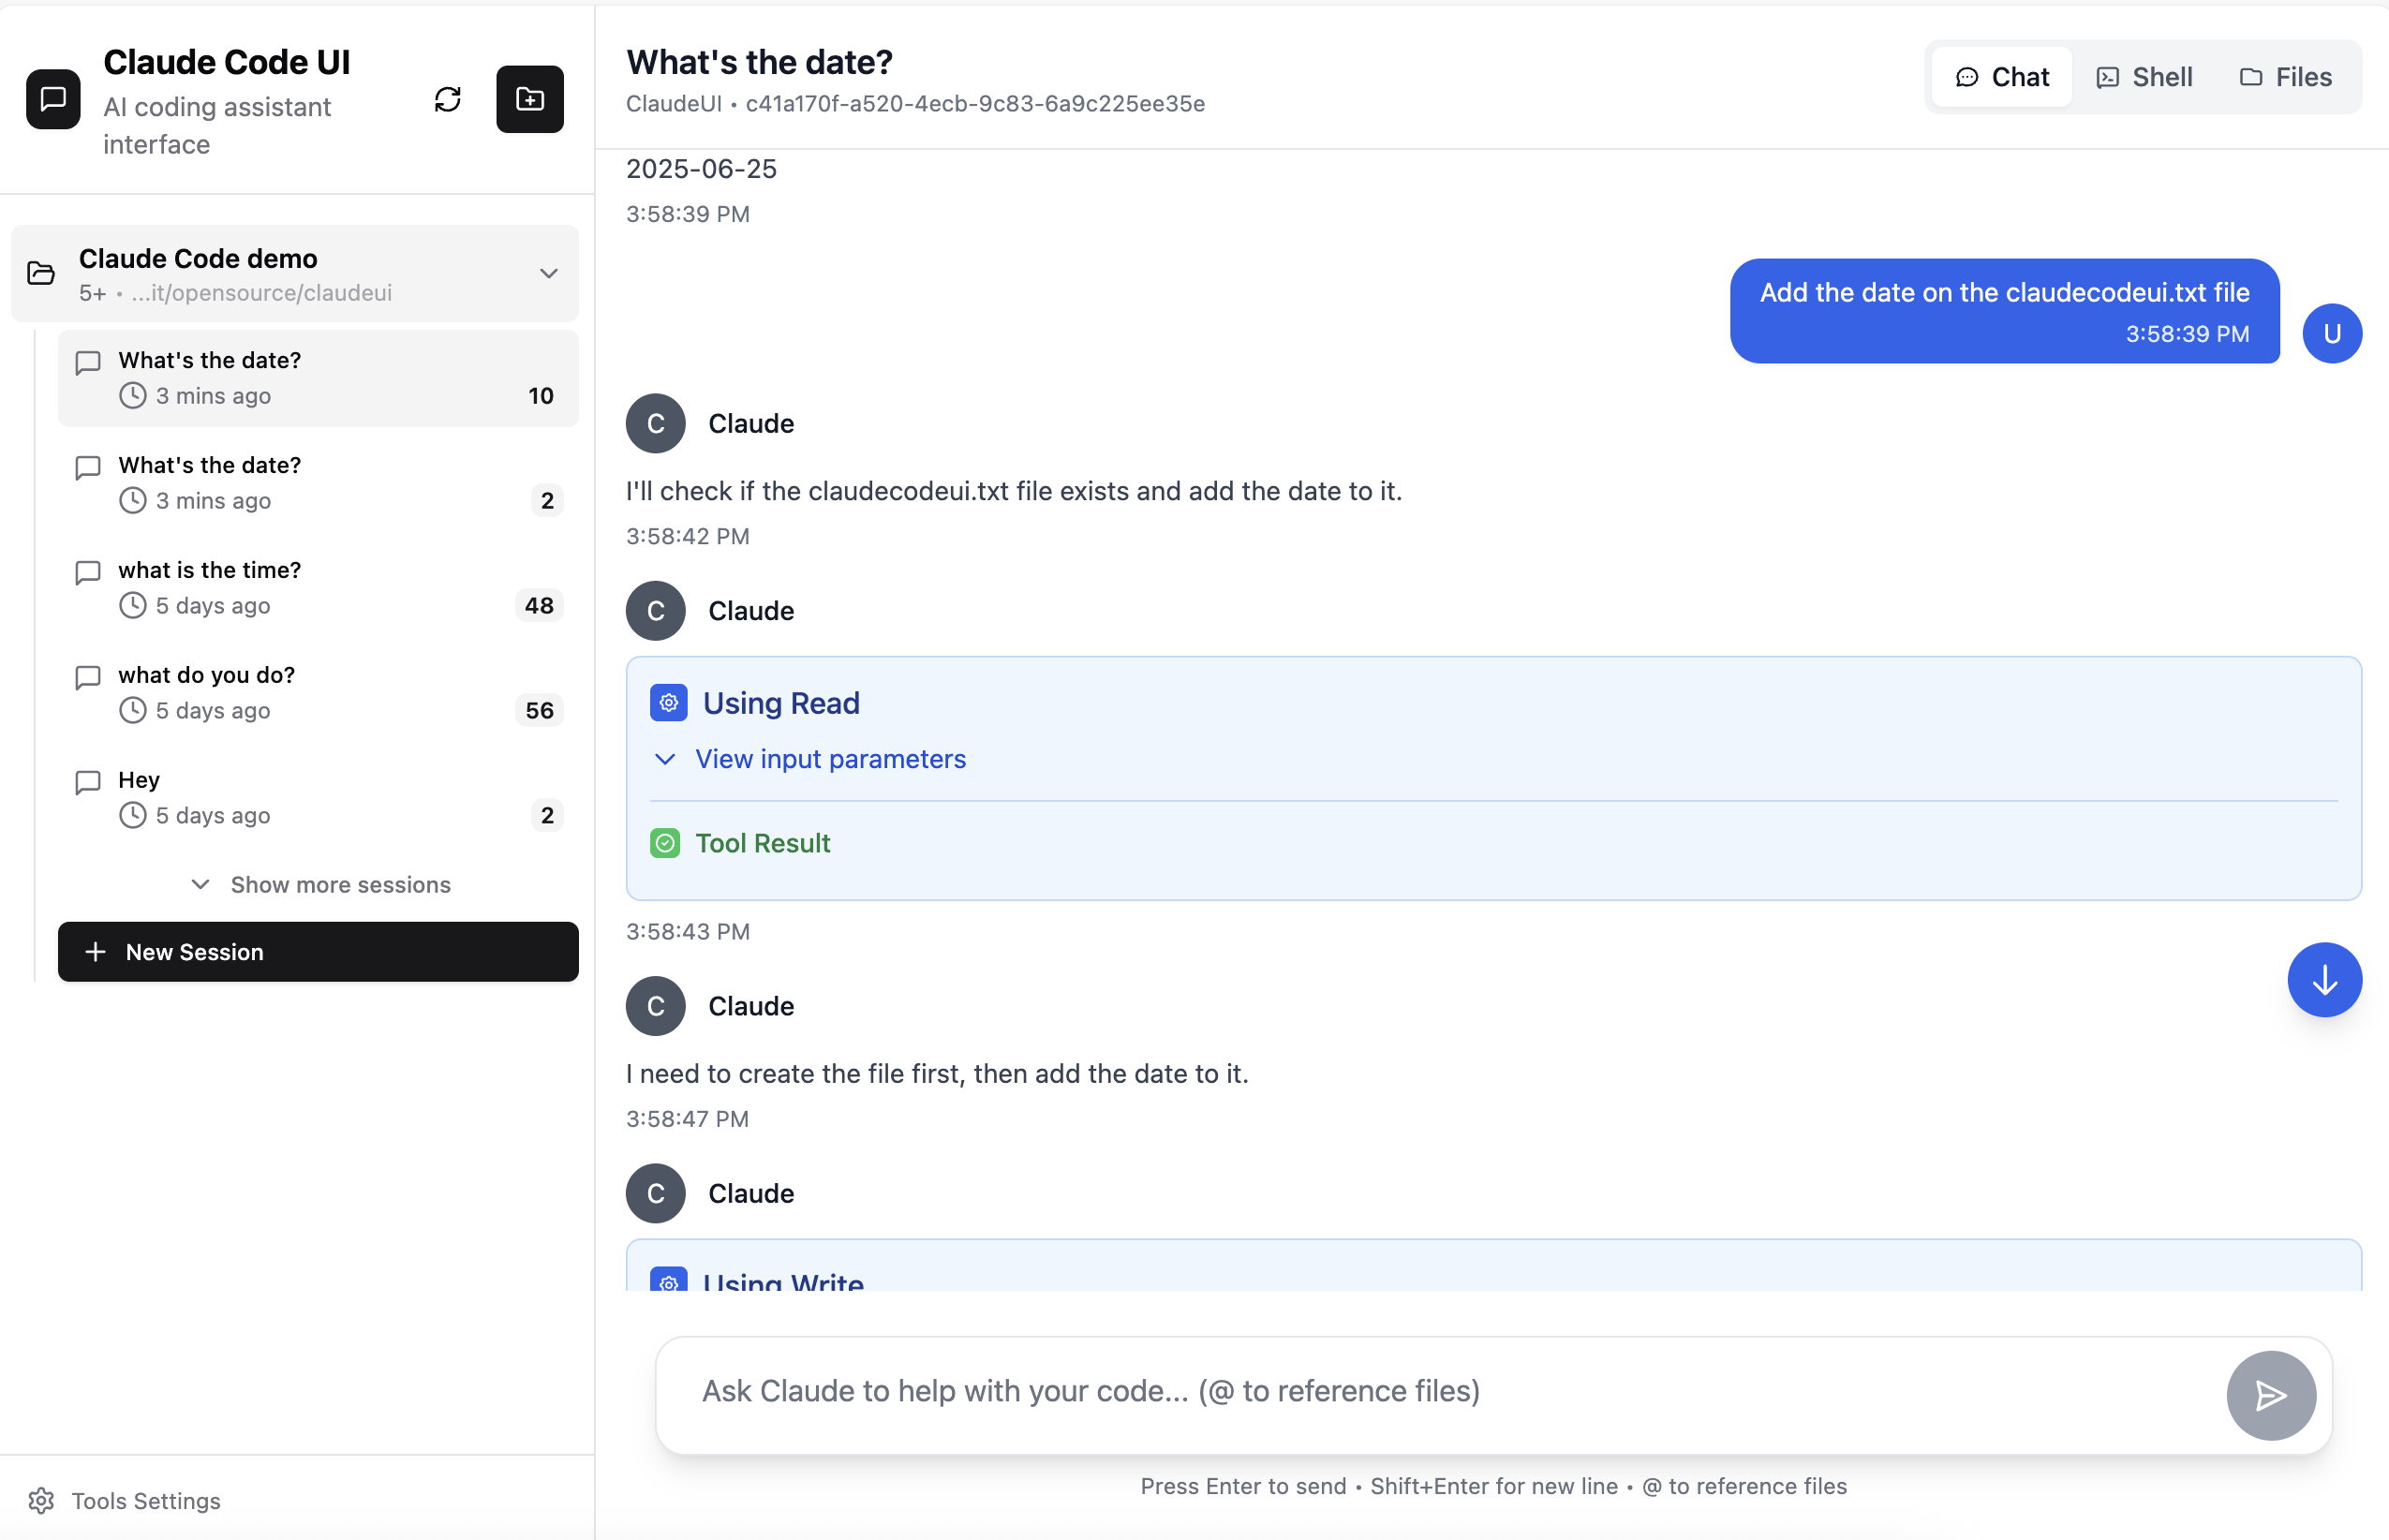
The Pixcode workspace is organized around the active project. The main area can be a chat screen or the orchestration system, depending on what the user is doing. Supporting panels such as Shell, Files, and Source Control can open alongside the main view, so the user does not lose context.
Chat
Chat is project-aware and session-based. The prompt composer stays fixed at the bottom of the screen in the main chat/project view. Users can switch providers and modes, send multiline messages, use slash commands, and review tool output in structured components.
Shell
The shell panel gives direct project terminal access from inside the browser. On desktop, the panel can open as a split view first and expand to a full panel if needed. On mobile, the layout avoids desktop-only split behavior and adapts to the smaller screen.
Files
The file browser supports project navigation, file opening, editing, upload, rename, delete, and detailed metadata. Narrow-panel behavior is tuned so long names and permissions do not consume the entire view.
Source Control
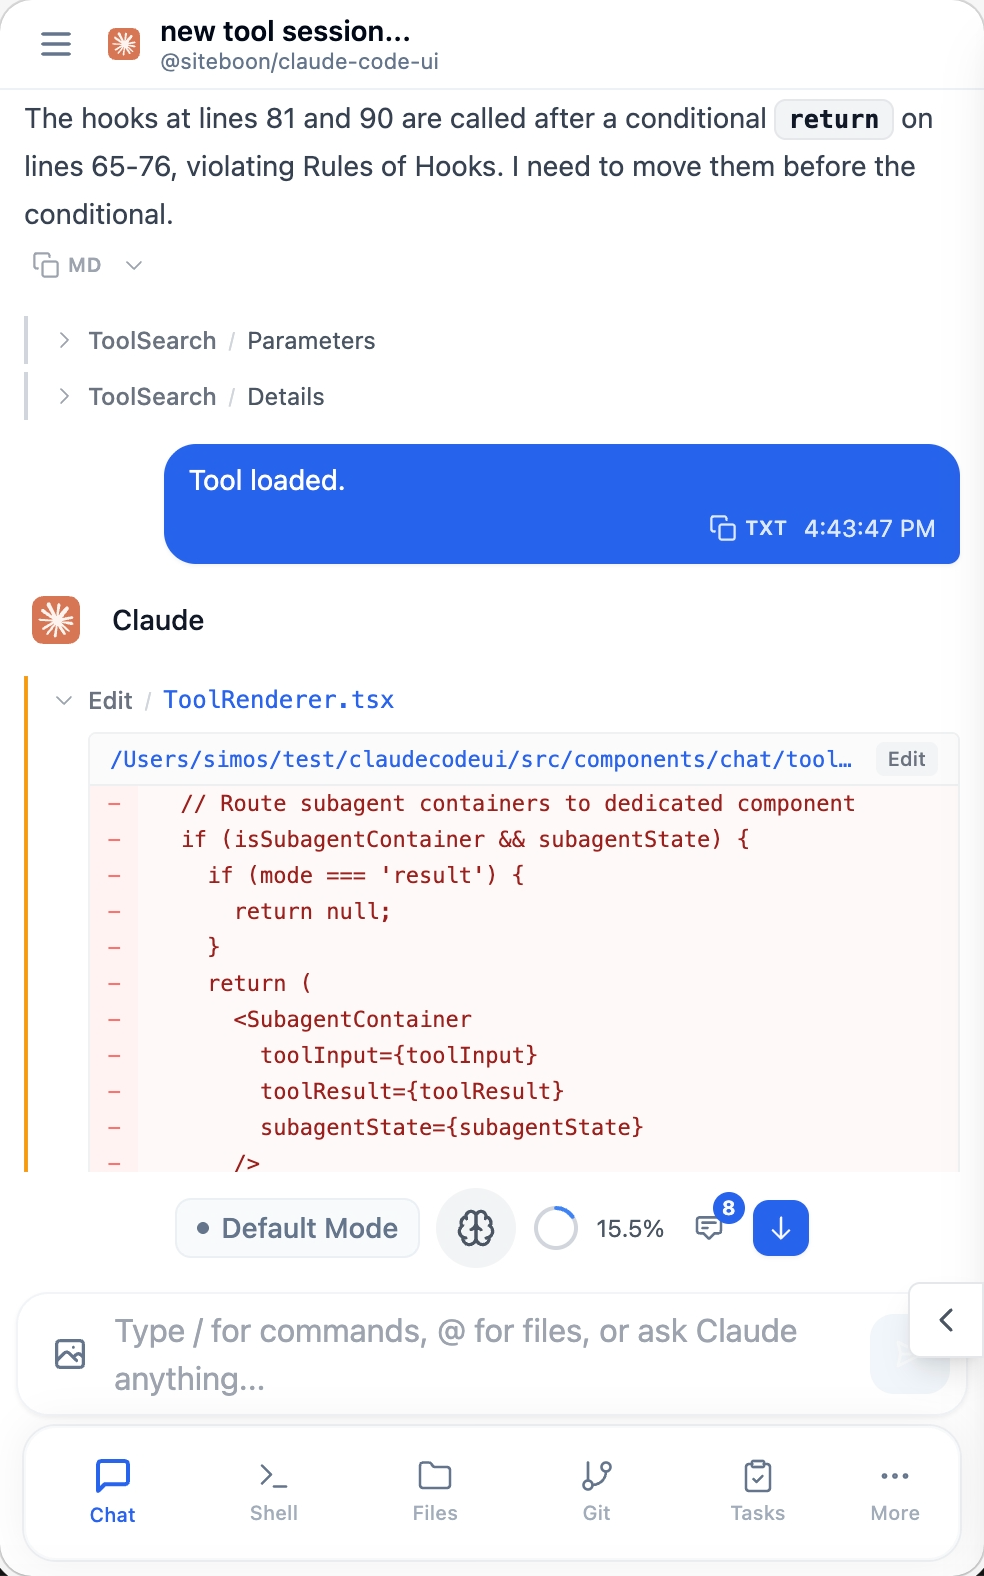
Source Control shows Git status, changed files, diffs, branches, commits, and repository actions. It is designed to be close to agent work, because code-generating agents must be reviewed through actual diffs, not only through chat summaries.
Changed files command center
Pixcode can watch Git changes or local filesystem changes. In Quick Settings, the Command Center view can show changed files as they appear, highlight newly modified paths, and open the related file location. This helps users keep control when an AI agent edits multiple files quickly, even when the project is not a Git repository.
The important design point is that this does not depend on GitHub pushes. It works with local changes, so the user can review the agent's work before committing, pushing, tagging, or publishing.
Multi-agent orchestration
Pixcode orchestration coordinates multiple child agents around one goal. The workflow layer uses adapter-backed tasks, shared context, per-agent metadata, run events, preview endpoints, cancellation, and a UI that lets users resize the setup and output panes.
- Agent Team for role-based work distribution.
- Multi-model Review for independent review from different providers or models.
- Sequential Handoff for ordered workflows where later steps depend on earlier output.
- Decision Debate for comparing approaches before implementation.
- Per-agent label, role, model, instruction, and fallback CLI selection.
- Workflow DAG preview before execution.
- Run event streaming and cancellation.
For deeper orchestration details, see orchestration.html.
Background workflows
Pixcode uses orchestration for project-aware background workflow, review, and verification tasks. It runs inside the current Pixcode instance, understands the selected project, and routes work to the configured CLI provider.
Orchestration APIs expose agent metadata, workflow state, project-scoped task history, streamed output, and artifacts under authenticated endpoints.
GET /api/orchestration/agents
GET /api/orchestration/tasks
GET /api/orchestration/workflows/runs/:runId
API and automation
Pixcode is API-first internally: the frontend communicates with the backend through REST and WebSocket APIs. External tools can use Pixcode API keys for automation. New keys use the `px_` prefix, while older `ck_` keys remain accepted for compatibility.
curl http://localhost:3001/api/projects \
  -H "Authorization: Bearer px_your_key_here"
Automation can list projects, run one-shot provider tasks, preview orchestration graphs, start workflow runs, stream events, cancel work, and integrate Pixcode into CI, scripts, dashboards, or Telegram-style bridges.
See api-automation.html and openapi.yaml.
Notifications and Telegram
Long-running agent tasks should report back. Pixcode includes browser push notification support and a Telegram pairing flow. Users can receive notifications when sessions complete, fail, or require action. Telegram bridge behavior can route messages back into the Pixcode instance when enabled.
Plugins and MCP
Pixcode includes extension points for provider tools, MCP server management, and plugins. Provider-specific settings can manage MCP configuration, sessions, API-key credentials, OAuth paste flows, install jobs, and model catalogs. Plugins can add frontend tabs and optional backend services.
- MCP server management for supported providers.
- Provider auth and session panels.
- Model refresh and CLI install status.
- Plugin loader support for UI tabs and backend integrations.
Themes and appearance
Pixcode supports dark/light mode, built-in accent palettes, VS Code-like colors, emerald command-style colors, and custom accent values for dark and light modes. Theme tokens affect buttons, active states, focus rings, navigation, and other high-emphasis UI parts together.
Install and deployment
Pixcode targets Node.js 22+. The recommended quick start is npx or a global npm installation. Normal installed runtime serves the backend and built frontend through port 3001. Vite port 5173 is only for separate frontend development.
npx @pixelbyte-software/pixcodenpm install -g @pixelbyte-software/pixcode
pixcodepixcode daemon install --mode auto --port 3001
pixcode daemon status --mode autoDesktop installers are published from GitHub releases for Windows `.exe`, macOS `.dmg`, and Linux package/AppImage-style assets depending on the release.
Security model
Pixcode can control project files, shell sessions, Git state, provider CLIs, API keys, and external notification channels. Treat it like a powerful local admin interface. Use strong account credentials, rotate exposed API keys, and put public server deployments behind trusted network controls such as a reverse proxy, firewall, or VPN.
- Local account login protects the web UI.
- API keys are for automation and should be scoped operationally by where they are stored.
- Provider secrets should not be exposed in logs, screenshots, public pages, or issue reports.
- Remote deployments should be treated as sensitive developer infrastructure.
Development workflow
The frontend is React + Vite. The backend is Express + WebSocket with provider routes, orchestration modules, SQLite-backed auth data, and CLI adapter files. There is no unit test suite configured today; use typecheck, lint, build, and targeted manual smoke checks.
npm install
npm run typecheck
npm run lint
npm run build
Important: `npm run dev` starts the daemon manager on Linux. For separate frontend development, use `npm run client`. For built backend runtime, rebuild before `npm run server`.